Basic Steps of Soldering |

|
SOLDERING WIRES TO A 1/4" (Female Jack ) Tools / Materials Needed STEP 1 - Cut Your Wire to Length STEP 2 - Strip Your Wire Insulation STEP 3 - Tin Your Wire Ends STEP 4 - Solder Wire Ends to Jack Leads STEP 5 - Prepare your heat shrink protective cover STEP 6 - Use Heat Gun on Heat Shrink Cover |
|
TOOLS / MATERIALS NEEDED
|

|
DISCLAIMER:
By using this procedure you agree to take full responsibility for damages
or
|

Below are step by step instructions for how to solder wires You can click on each picture to see a large view of that picture.
 Obtain a 1/8" mono
phone jack (see photo)
Obtain a 1/8" mono
phone jack (see photo) Now
it's time to prepare the ends of two wires to solder to the jack.
First strip about 1/8" of housing from the wire using wire strippers or your
finger nails. Apply some
solder to your soldering iron and quickly touch the iron to the wire to
"tin" the wire. This will prepare the wire to be easily soldered to another
surface shown in the next step.
Now
it's time to prepare the ends of two wires to solder to the jack.
First strip about 1/8" of housing from the wire using wire strippers or your
finger nails. Apply some
solder to your soldering iron and quickly touch the iron to the wire to
"tin" the wire. This will prepare the wire to be easily soldered to another
surface shown in the next step. 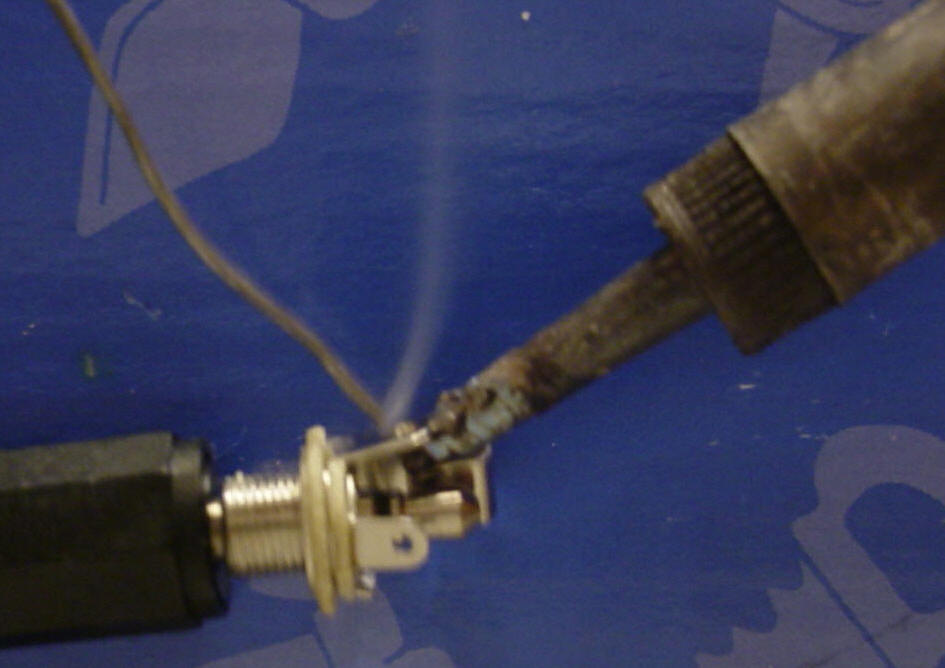 Now
it's time to prepare the jack for soldering. It is my preference to
tin the leads of the jack with a thin layer of solder.
Now
it's time to prepare the jack for soldering. It is my preference to
tin the leads of the jack with a thin layer of solder.
It is very important to heat the jack up hot enough so the solder will stick to it successfully. I have seen many times when solder is melted onto the lead and looks like it is well attached, only to find out later that it was just barely sitting on the lead and it fell off.
The secret to tell if solder is truly attached is by looking for the "wet out" behavior that occurs when the soldering surface reaches melting point of the solder. All of a sudden you will se the melted ball of solder pancake out, the edges will be lowered instead of raised.
If you want to solder to a jack such as the one shown in the picture, the only problem is that it will burn your hands if you try and hold it. So you must use a small nail, or small screwdriver, or a male jack plug to hold it still when you are working on it. Or have some one else hold it, or put it in a vice. There are many types of soldering bench vices on the market that you can buy.
 Now
you are ready to solder the wires to the jack. Gently touch the wire
that you have tinned to the lead of the jack and apply the soldering iron at
the same time. The two surfaces have both been tinned with solder so
they should immediately bond together.
Now
you are ready to solder the wires to the jack. Gently touch the wire
that you have tinned to the lead of the jack and apply the soldering iron at
the same time. The two surfaces have both been tinned with solder so
they should immediately bond together.
The other precaution you must take is to be careful that when you solder that you do NOT add solder to other traces or other points on the circuit board because the solder will short out these points. If this happens you will need need to use a solder sucker to remove unwanted solder from the board.
Or you will need to use solder wick which is a braided copper material that attracts solder when heated up. You have to lay the braid on top of the spot that has the unwanted solder, then press the tip of your soldering iron on to it. WATCH OUT! It gets very hot and you will need to hold the solder wick 6 inches away from where you are touching the soldering iron to it. The problem with using solder wick is that it will remove solder from all the soldering sites it is touching. Unless you purchase very find 1/16" inch wide solder wick.